Once the idea is decided, it needs to be put into action. Here are what I need to do next *Creating images with Midjourney *Making a support bracket *Testing the code
In this post, I will mainly talk about the process of creating images.
Creating Images with Midjourney
My initial idea was to create a character in the style of Pixar's 3D animations, based on myself as the prototype,
and place this character in different environments based on my status. For instance, if I am in my room,
the display would show this cartoon character sitting at a desk, and if I am on campus,
it would display an image of the character walking around the campus. Based on this idea,
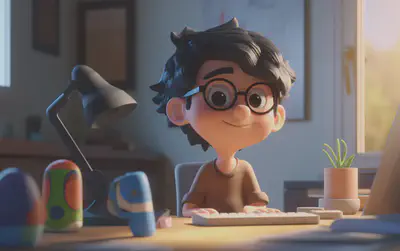
I first used my own photo to generate images in the corresponding style.
Image Credit: Ⓒ WEILISI
(Here are a few versions generated from the picture on the homepage)
These pictures indeed have the style I wanted, so I decided to keep the seed from the upper right picture for scene changes.
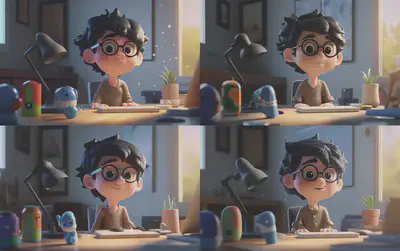
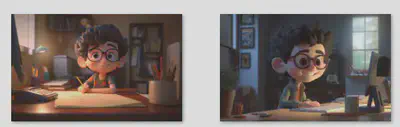
After several attempts to create scenes with me sitting at the desk, I found that the pictures generated from a seed
seemed to keep the composition of the original image, making the desk the background, which is not what I wanted.
Image Credit: Ⓒ WEILISI
(All these pictures feature the character standing in front of the desk)
In the end, I decided to abandon the use of seed for image generation. I thought that
"wavy short black hair + glasses" could, to some extent, generate characters with my characteristics,
so I added these keywords to the prompt to replace the seed from the original picture.
Finally, the first picture I was satisfied with was created.
Image Credit: Ⓒ WEILISI
(The prompt is as follows:
a cute boy with wavy short black hair, smiling, sitting in front of a PC, desktop computer, eyeglasses, sunshine from window, 3d art, c4d, octane render, ray tracing, popmart blind box, clay material, Pixar trend --ar 16:10 --v 5 --q 2 --s 750
)
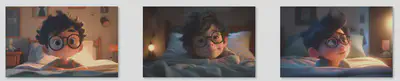
My original plan was to change the scenes in the pictures according to the weather. So I tried to change the "sunshine" part
in the prompt of the previous picture to "rain outside the window". However,
the AI seemed not to understand my intention and just added some droplets next to the character.
The result did not meet my expectations, and it seemed difficult to adjust, so I gave up temporarily.
Image Credit: Ⓒ WEILISI
(The new prompt didn't work well)
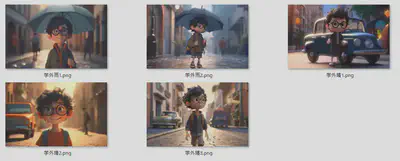
It was not that difficult to represent the states of "off campus" and "on campus"
when portraying a rainy scene. I managed to create several images at once.
Image Credit: Ⓒ WEILISI
(off campus)
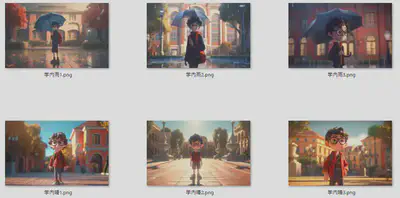
Image Credit: Ⓒ WEILISI
(on campus)
I then used the same method to create images for other statuses such as “in the room”, “in the canteen”, and “back home”.
Image Credit: Ⓒ WEILISI
(in the room)
Image Credit: Ⓒ WEILISI
(in the canteen)
Image Credit: Ⓒ WEILISI
(back home)
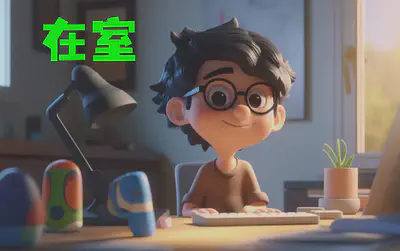
In the end, I felt that although the backgrounds could express my current state, they couldn't achieve an effect
that was immediately clear. So I used a "dumb method"—I added the text of the current state to these images
on my iPad using Procreate. That's how I completed the image part.
Image Credit: Ⓒ WEILISI
(The images with text added)
In my imagination, it would be best to have a GIF-like Lofi Girl.
But currently, AI is not very convenient for creating GIFs, so this can be considered as a future plan.